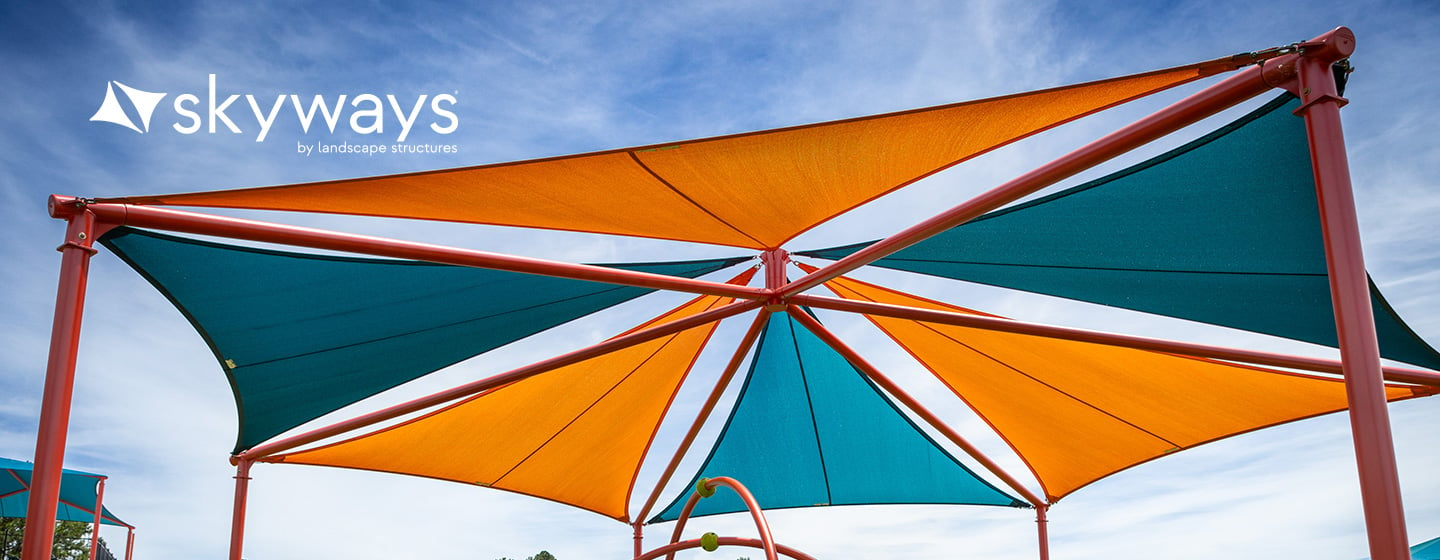
Shade fabric creates an island of sun-safe fun
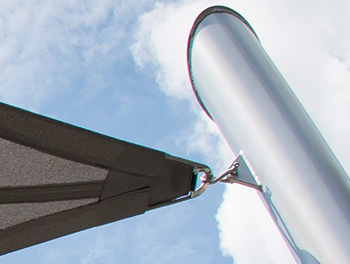 SkyWays® uses knitted mid-duty HDPE as our standard, one of the strongest standard fabrics available in the industry, leading in tensile, tear and burst strengths. We also have heavy-duty fabric available as a custom option for very large spans. We reinforce all corners with 16-ounce non-tear vinyl and all pockets with protective webbing where steel cable enters and exist. SkyWays products are engineered for super durability and are lead and phthalate free. The fabric colors shown below are fire retardant and certified to the California Fire Marshall - the highest standard for flame resistance and conforms to the following standards.
- ASTM E-84: Class A
- CSFM 127.1 Title 19: Certified
- NFPA 701: Conforms
Our global network of commercial shade experts are available to help you the right shade sail size, shape and attachment method that meets your project needs. They are a highly trained and responsive team who are deeply engaged and go above and beyond to deliver on every project.
Shade Fabric Colors
Our breathable flame retardant (FR) shade fabric is made of high density polyethyelene (HDPE). Designed to block up to 97 percent of the sun's UV rays and keep temperatures up to 30-degrees cooler. It's also resistant to mildew, fading and ultraviolet rays, making it a long-lasting, great looking addition to your playground. Our fabrics are stringently tested and conform to FR standards worldwide.


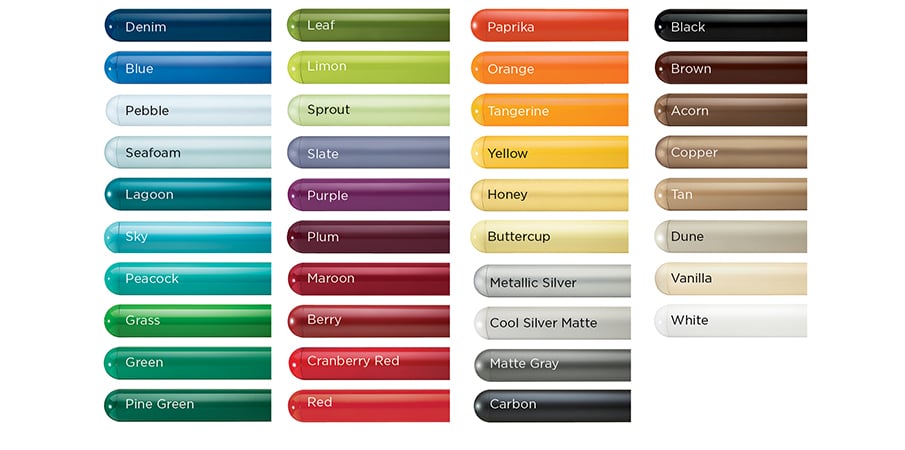
Shade Post Colors
ProShield® finish is specifically designed to withstand the demands of extreme heat, harsh climates, moisture and UV exposure. ProShield finish combines a specially formulated primer with a high-quality, architectural-grade, Super-Durable TGIC polyester powdercoat. This ensures vibrant long-lasting color, a glossier finish, fewer chips and less maintenance. No lead-based paints.
Rapid Release® Technology
There are a variety of reasons why you may want to remove and reinstall your canopy. The changing seasons, to prepare for inclement weather, a desire for a new color scheme. Fortunately, we’ve made it quick and easy for you with our patented Rapid Release® system for SkyWays shade products. We’ve designed an adjustable mechanism to quickly release your shades and to ensure that you achieve proper tensioning while reinstalling the canopy with no struggle.
Rapid Release is available on most SkyWays standard shade products. For SkyWays shade structures over 40 feet, the Rapid Release technology can be added as custom only.
Playground products shown in video may not be appropriate for every age group. Playsystems shown in video are for demonstration purposes only. Product configurations may vary.
Video features the Rapid Release technology of the SkyWays playground shade sails.
[video: Scene fades into an elevated view of the roof of an industrial building. Camera switches to a panning view across the outside of the building entrance. Scene switches to a man standing in a warehouse with shelves full of rolled material behind him. White text appears at the bottom of the screen reading: Rapid Release.]
Voiceover: Hi I’m Jonathan Wacker and we’re down here at SkyWays to talk about the new rapid release option for our shade structures.
[video: close-up of Jonathan as he speaks to the camera in the warehouse. White text appears to the left of Jonathan reading: Jonathan Wacker Design Engineer Skyways Shade Division.]
Jonathan: The rapid release system is designed to allow the user to remove and uninstall their fabric structures with limited amount of tools and a quick and effective way.
[video: camera does an elevated pan through the warehouse where a group of workers fasten shade sales to posts. Camera switches to an overhead view of two post structures with shade sails lying on the ground below them. Camera switches back to Jonathan as he stands by a set up shade system.]
Jonathan: What we have set up here today is a mock-up of the three different styles of quick release that we have that utilizes three different sails.
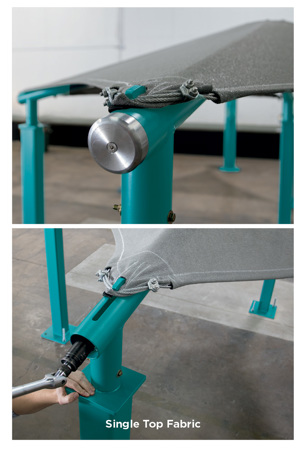
Jonathan voiceover: So, we have our single top sail that goes on your normal hip structures.
[video: Jonathan walks from one post to the other.]
Jonathan voiceover: Over here we have a multi panel sails that can be more for your hex systems and then over in the yellow fabric is set up for a tension sail. Each one of these systems has its own rapid release specifically designed for it.
[video: Camera views the top of a yellow triangle shade sail connected to three posts. Camera switches back to Jonathan as he points to the rapid release system on one of the posts.]
Jonathan: Our normal configuration would be a single top hip style configuration where we’re utilizing a pin on the top rather than our normal pins on the front-ends.
[video: close-up of the sails cable connection to the hook system of the post.]
Jonathan voiceover: We use a aluminum cap to hide the actual internal mechanism.
[video: camera close-up of the rapid release system as the camera goes in and out of focus.]
Jonathan voiceover: What you’re first going to do is remove this aluminum cap. We are going to remove the countersunk screw located at the center of the cap.
[video: camera focuses on the rapid release system where a metal cap is mounted to the end of a post. Jonathan points to the cap then brings a large Allen wrench to loosen the screw. The camera zooms in on Jonathan’s hands as he fully removes the screw and the metal cap from the post.]
Jonathan voiceover: One the aluminum cap is removed we’re going to use a one and a quarter inch socket to back off this screw here.
[video: Jonathan points to a large screw in the center of the most where he removed the metal cap. Camera switches to a view of Jonathan listening the large screw with a socket wrench.]
Jonathan voiceover: By backing off this screw it allows this pin location to move along a slot reducing tension in the cables and the fabric itself.
[video: Jonathan points to the top of the post where a hook shaped pin holds onto the fabric and the connected cables. As he rotates the socket wrench the hook pin can be seen moving slightly releasing the tension on the fabric and the cables. Camera pulls back for a full view as Jonathan un tighten the screw releasing the sail and its cable. The camera zooms back into the top hook pin as Jonathan continues to loosen the screw.]
Jonathan voiceover: As you can see after a few turns the fabric is loosening up, cables are loosening up, making it easier to manipulate and remove the fabric top.
[video: the camera pans across the fabric showing the tension releasing across it. Camera switches to an elevated view as Jonathan continues to loosen the fabric and cable. The camera zooms in on the slot where the hook pin as moved back to release the tension of the fabric. Camera pulls back for a full view of Jonathan and the rapid release system.]
Jonathan: Now that the tensions removed from the fabric we can remove the cables from the pin location.
[video: Jonathan lifts the cable up and over the hook pin and then does the same releasing the fabric.]
Jonathan voiceover: And then uninstall the fabric from the pin.
Jonathan: Following that you’ll release it from the other pin locations and then remove your fabric.
[video: he lifts the fabric to the center of the post structure. Camera switches to a side view as Jonathan releases fabric and cable from the other pin locations. Jonathan gets on a ladder to release the shade from the top center peak of the post structure. Jonathan switches to the other side of the post structure where another shade sail is connected.]
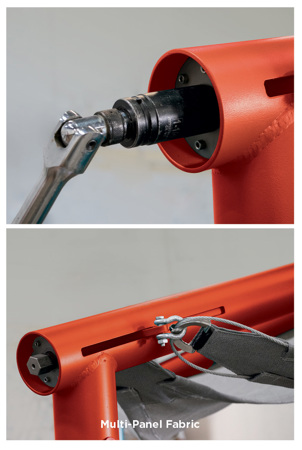
Jonathan: The rapid release system for the multi panel tops follows the same design as the single panel top
[video: close-up of different angles of the two-pin hook system holding the shade sail on.]
Jonathan voiceover: The key difference is that this now has two pin locations. Located on the side of the tube rather than the single pin location located at the top.
[video: camera switches to different close-ups of the cable bolts and system hooks. Jonathan unscrews the metal cap revealing the large screw to release the hook pin.]
Jonathan voiceover: You’re going to remove the aluminum cap, you’re going to use your socket wrench to loosen the nut and while doing that it moves both pin locations along the slot shown.
[video: Jonathan takes the socket wrench and begins loosening the screw to release the pins. Camera switches to a top down view as Jonathan loosens the screw. The fabric on both individual sails begin to loosen. Camera goes back to a full view of Jonathan as he continues to loosen the screw with the socket wrench. The camera zooms in on Jonathans hands as he rotates the wrench.]
Jonathan voiceover: With this system it releases tension of both sales at the exact same time.
[video: close-up of the pin as it slides to lease the fabric and cables.]
Jonathan voiceover: Now that the tension is removed from your sales you can remove your shackle.
[video: close-up of Jonathan’s hands as he loosens a bolt on the end of a shackle connecting the fabric to the pin. Camera pulls back for a full view of the post structures as Jonathan releases a shackle from the pin.]
Jonathan voiceover: And then from here you can remove the other two shackled locations.
[video: Jonathan releases the shade sail from the three shackled locations on the post system. The camera pulls back for a full view of the two sails removed from the post system. Scene switches to Jonathan standing by a different post system with a yellow shade sail.]
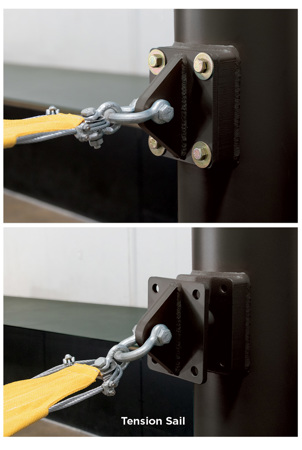
Jonathan: With the rapid release system designed for the tension sail system the functionality works the exact same way as our other rapid release systems.
[video: top down close-up view of different connection of the tension sail system on how it is connected to a looped ring to the main support post. Camera switches back to Jonathan as he explains the steps to remove a sail from this different post system.]
Jonathan: The first step for utilizing the tension sail rapid release system is to remove the four bolts. By removing these four bolts it’s transferring the tension from the bolts to the rapid release system.
[video: Jonathan loosens the four bolts on the post. The camera zooms in on Jonathans hands as he unscrews the bolts.]
Jonathan voiceover: Now that the tension is transferred to the rapid release system we’re going to follow the same procedure. First we’re going to remove the aluminum cap. Next, we’re going to use our socket wrench to loosen the nut.
[video: camera close-up of Jonathan removing the aluminum cap on the back side of the support post. Camera pulls back to show Jonathan as he uses the socket wrench to loosen the tension nut. The camera zooms in on his hands as he rotates the wrench.]
Jonathan voiceover: By loosening the nut it allows the mechanism to move and thus releasing tension in the sail.
[video: close-up of the square plate separating from the main support post as Jonathan turns the wrench. A full view of the fabric as it begins to go limp with the release of the tension. Jonathan unhooks the fabric from a shackle. He goes to the other two posts and disconnects the fabric.]
Jonathan: So now that your shade top is removed you’re going to return the rapid release to its original starting position and reinstall the four bolts. You’re going to use your socket wrench and tighten the nut retracting the rapid release mechanism.
[video: Jonathan begins to tighten the large nut with the socket wrench. The square plate on the other side of the post slowly inches closer and becomes flush with the post.]
Jonathan voiceover: Now that the rapid release system is returned to its starting position you’re going to reinstall the four bolts.
[video: Jonathan reinstalls all four bolts into the corners of the square shaped plate. The camera rotates around Jonathan as he tightens the different bolts.]
Jonathan: Finally, you’re going to reinstall the aluminum cap.
[video: Jonathan places the aluminum cap onto the back of the main support post and begins to screw it into place. The camera focuses on the replaced aluminum cap. Camera pulls back for a full view of Jonathan standing at the three-post system with the yellow sail lying on the ground.]
Jonathan: With the rapid release system from SkyWays and a few simple hand tools we can quickly remove any tension sale structure.
[video: screen fades to white with a SkyWays logo in the center. The SkyWays shade logo is made of four triangles skewed into the shape of an arrow head above the text of SkyWays by Landscape Structures.]
